Content
- The secret to the unique cat-eye effect
- Cat eye manicure design
- How to make a cat eye manicure at home
A trend called “cat eye” or “cat eyes” appeared a couple of years ago, but in the spring of 2016 it reached its peak of popularity. Stars and television presenters make a cat-eye manicure, so you must please yourself with such beauty.
The secret of the popularity of cat’s eye manicure is its versatility. Due to the shine and chic color depth, it does not require additional decor and looks good on short nails, therefore it is indispensable as an office nail art. But if you add a little velvet sand, decorative pebbles and paint your nails on the ring fingers, you get a chic manicure for publication.
Do you already want to admire this beauty on your own nails? Read the article soon, and we will help create something truly special..
The secret to the unique cat-eye effect
The history of cat’s eyes began 5-7 years ago in the era of the emergence of magnetic varnishes. At first, they were produced exclusively as inexpensive decorative options, on the surface of which with the help of special magnets it was possible to create a variety of patterns that differ in shade from the color of the base. Unfortunately, this beauty looked decent for no more than 3-4 days, and for housewives – until the first dishwasher.
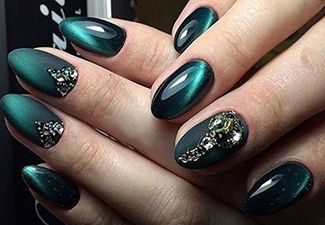
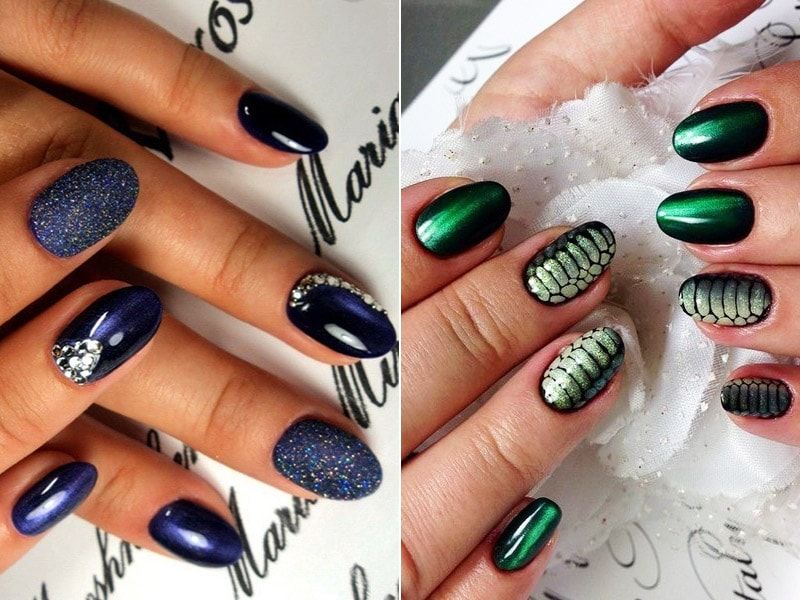
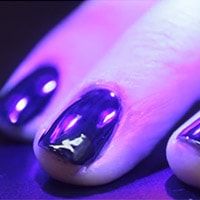
But the creators of gel varnishes made a revolution: several brands (Kodi, Lianail, Bluesky) released varnishes containing the smallest particles of metal, which, under the influence of a magnet, are assembled into unique 3D patterns. It seems that the light entering the nail is concentrated only in these patterns, adding an unusual radiance to the manicure. It is this property of collecting light in only one narrow strip that the chrysoberyl gemstone or cat’s eye has, which gave the name to the new direction of nail art.
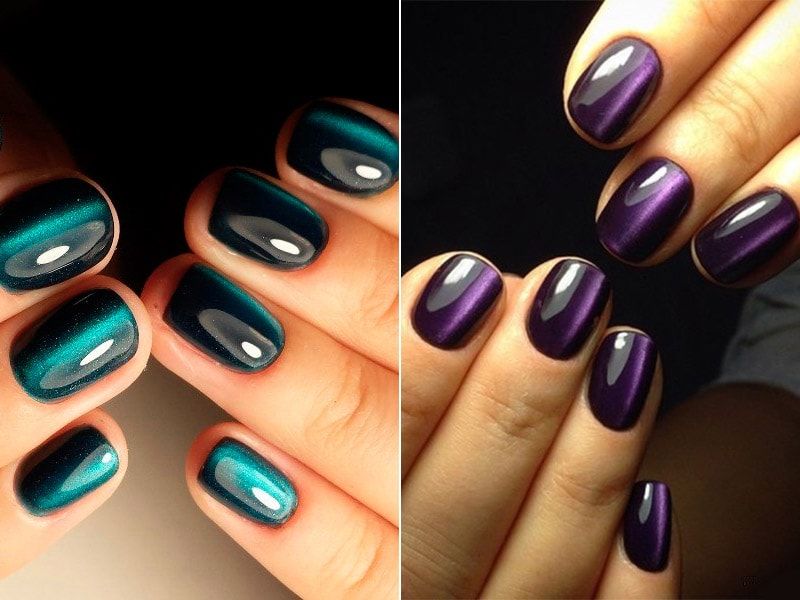
Cat eye manicure design
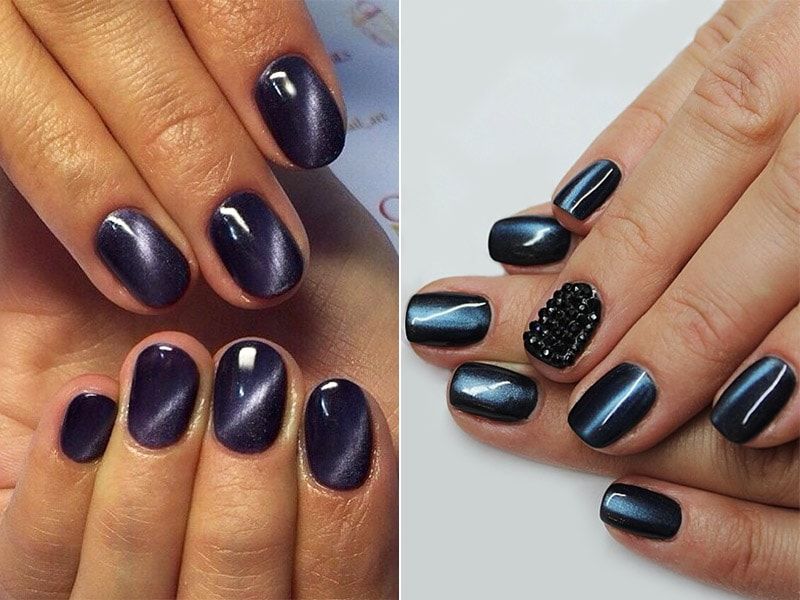
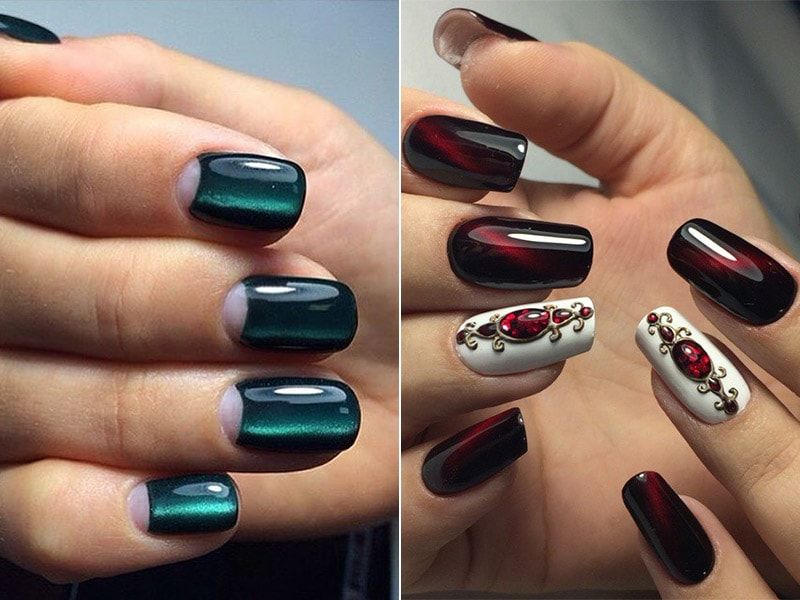
It is believed that the cat’s eye manicure looks best in the natural gamut of chrysoberyl stone – bluish-green, brown, green, gray, blue tones. The deeper and darker the color of the varnish is, the better the pattern will stand out, and the more elegant the manicure will look.
Some masters generally make a dark “backing” to maximize the shade: black gel polish is applied on top of the base, dried in a UV lamp, and then the cat-eye effect is applied.
Another professional secret is to never make a matte cat eye. The lack of glossy gloss “eats” the very highlight of manicure.
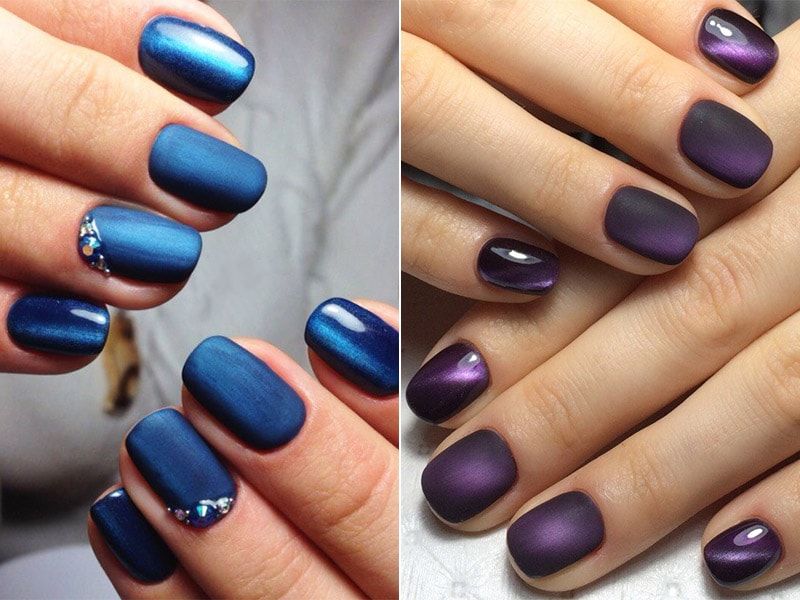
But to complement the cat’s eye with modern ideas like a gradient or holes is allowed. This manicure also looks advantageous in combination with liquid stones, paintings and sparkles..
How to make a cat eye manicure at home
Preparatory stage
You will need:
- degreasing fluid;
- manicure set;
- base and top coat;
- gel polish with metal particles;
- black gel polish for the substrate;
- magnet for gel polish;
- UV or LED lamp.
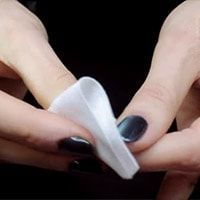
When everything you need is already on your table, wash your hands and proceed to your usual cut or unedged manicure. Align the length of the nails, give them the desired shape, polish the nail plate. The more perfect your pens are, the better the gel coating will look on them.
The technology of applying gel polish “cat’s eye”
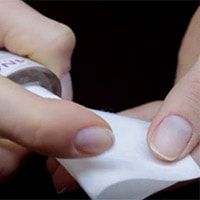
1. Degrease the surface of each nail.
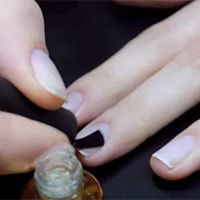
2. Apply base coat in one coat.
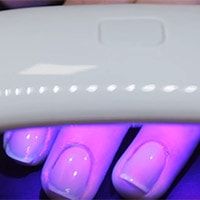
3. Dry in a lamp for 1-2 minutes.
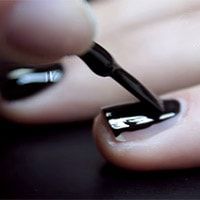
4. Apply the substrate (black or any dark gel polish) in one coat.
5. Also dry until completely solidified..
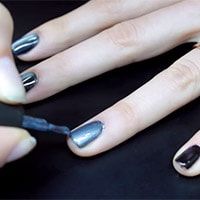
6. Prior to this, it was possible to work with five fingers at the same time, but in the fourth stage, it would be necessary to paint each nail individually to avoid spreading the varnish and achieve an identical pattern on both hands. Apply one coat of varnish with metal particles, wait 1-2 seconds.
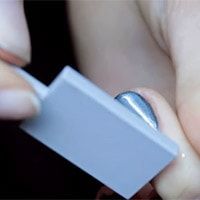
7. Hold the magnet to the nail at a distance of 1-3 millimeters. Without shifting, hold it above the surface of the nail plate for 15 seconds.
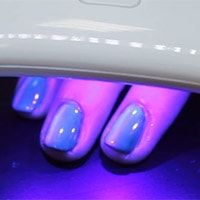
8. Then dry in a lamp. Repeating this procedure for each finger, make sure that the pattern from the magnet lies equally. On top, you can (optionally) apply the top protective coating in one layer and hold in the lamp until it hardens.
9. Remove the sticky layer and lubricate your hands with special emollient oil.
That’s all, your first cat eye manicure is ready! Now that the technology is completely clear to you, you can experiment with more complex options for nail art or explain to your friends how to make a cat’s eye at home.
Tips for beginners:
- keep magnets separately from gel polish, otherwise it will quickly become worthless;
- before use, shake the gel container well to evenly distribute metal dust;
- do not forget about degreasing and applying a basic coating, otherwise you risk getting peeling of the varnish in a few days;
- if for some reason you do not apply dark varnish as a substrate, then first paint and dry the cat’s eye without using a magnet, and apply the picture only on the second layer;
- keep the magnet as close to the surface of the nail plate as possible, but do not allow touching;
- be sure to work with each nail separately, otherwise the varnish will harden or spread out – and a clear pattern will not work;
- try once to do without a top coating – some masters believe that it worsens the visual perception of cat’s eye manicure;
- the first two days after applying gel polish, avoid going to the sauna or bath – a sharp temperature drop can lead to cracking of the coating.
If you adhere to all the rules set forth in the article, then a beautiful cat-eye manicure will delight you and those around you for 2-3 weeks. The main thing is not to be afraid to try a new design or use cat eye as a base for a more complex manicure – this spring experiments are only welcome.